What kills mold on wood ?
What kills mold on wood ?
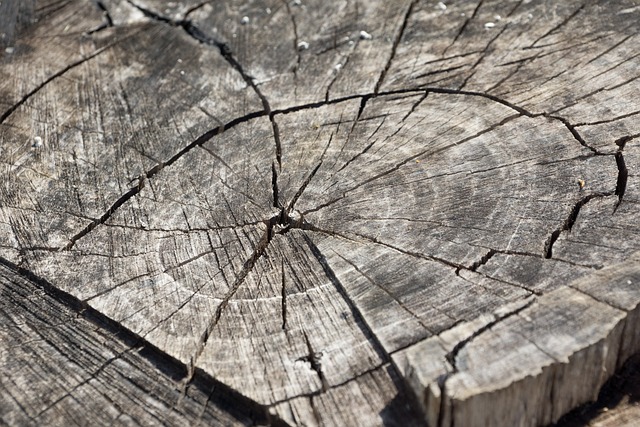
Mold in wood is an extremely common phenomenon, especially if the wood has been exposed to moisture or high humidity for an extended period. When excess moisture seeps deep into porous woods over time, mold spores present in the air or on the wood’s surface can germinate and grow, spreading gradually across the material.
This mold colonization initially appears as aesthetic surface staining or discolored spots. However, on prolonged neglect, mold can penetrate deeper, weakening structural integrity. Additionally, many molds release irritating particulate matter and gases affecting indoor air quality and health, especially for those with sensitivities. Remediating mold in wood early using appropriate removal methods is thus critical for preventing the spread and future infestations.
What are the most practical, safest DIY techniques to eliminate mold in wood surfaces at home without specialist gear? Follow these seven must-know tips and tricks for tackling surface or superficial wood mold effectively as a homeowner.
Tip 1: Identify the Wood Type and Extent of Mold Growth
When mold is spotted on a wood surface, first accurately identify the wood type and exact mold growth location/extent before attempting removal. Diagnosis guides the appropriate fix strategy, assessing necessary precautions. Inspector detection teams use moisture meters, thermal cameras, air samplers detecting mold indicators like Aspergillus spores, and lab verification methods unfeasible at-home.
Still, scrutinize using senses, tools like a sharp prod or knife to test penetrability, magnifying glass etc. Differentiate between mold colonies concentrated as surface growth versus hyphae networks penetrating deeper into core wood layers, which weaken material strength exponentially. Assess if growth spans under 1 square foot or over. Also, is mold traced to recurring moisture sources like a plumbing leak or one-off flooding?
Mold in wood risk increases dramatically with warmer temperatures, humidity exceeding 55%, stagnant air, and excess wood porosity, allowing easier moisture seepage to nourish fungi. Minimizing these factors prevents regrowth. Identify wood types correctly, too – softwoods like pine, cedar, spruce, etc, or hardwoods like oak, teak, maple, etc. Softwoods’ lower natural moisture resistance fosters plentiful mold nourishment, so they require faster fixing.
Tip 2: Protect Yourself When Working Around Mold
Fungal spores, metabolites, volatile organic compounds, and mycotoxins associated with mold growth disturb respiratory, skin, and eye health severely. As the mold removal process itself further liberates concentrated particulate into the surrounding air, meticulous personal safety protocols minimize inhalation and contact.
Wear tightly-fitted goggles, N95 respirator mask/ventilator directing purified air, headgear, hazmat suit covering full arms/legs, and double nitrile gloves taped at wrists for airtight fit. Seal vents/ducts nearby, arrange cross-ventilation exhausting air outdoors preventing circulation back indoors. Those with sensitivities or comprised immunity should steer clear of the site completely until full remediation is completed. Work in regulated bursts; cleanse body/gear thoroughly, later, avoiding cross-contamination. Mold spores stick readily to textured surfaces and fibrous materials so don’t reuse contaminated items around living spaces.
Tip 3: Isolate Mold Growth Area Before Remediating Further Spread
Before mold removal itself, isolate the broader vicinity surrounding growth at least 2-3 feet out using enclosures. Limit opportunities for disturbances like open windows, walking past the site, etc, which may disperse spores sticking onto nearby walls and furniture, exposing more building materials/inhabitants.
Clean surrounding area vigilantly beforehand using non-toxic antimicrobial cleaner applied by cloth/stiff brush combo proven to remove over 95% household grime buildup without aggravating contaminants. Allow surfaces to dry completely since any lingering moisture nourishes recurring mold.
Lastly, place protective sheeting on flooring/furnishings beneath/adjacent to growth to guard against debris/drips from upcoming remediation work. Proper isolation protects the rest of the rooms/buildings from preventable spillage spread and secondary colonies. Now, address removing mold from the wood itself using suitable techniques based on type/extent.
Tip 4: Sand Down Surface Mold Growth on Raw Wood
Surface mold limited under 1/8th inch depth on unfinished wood like exposed ceiling rafters, framing, etc, can be sanded away reasonably using manual tools, while deeper penetration necessitates expert chemical intervention.
Wear waterproof gear, and secure sandpaper with ~220+ grit onto the manual sanding block/electric orbital for the most control. Work top-to-bottom systematically, ensuring every square inch with visible mold gets thoroughly abraded till the sight of underlying bare wood. Optimal pressure is moderate without weakening integrity.
Apply the shop vacuum nozzle directly adjacent to the contact point, sucking debris simultaneously, preventing airborne scattering. Dispose of vacuum contents sealed immediately. Cleanse abraded wood using a non-toxic antimicrobial wash before allowing a full 24-hour drying time. Sanding eradicates this topmost layer along with mold quite effectively. However, excess zeal scrapes away protective wood too deeply.
Tip 5: Apply Anti-Mold Solutions to Surface Growth Under 1 Sq Ft
For managing scattered surface mold colonies across <1 sq ft of wood without damaging constructive material integrity through abrasion, specialized liquid applications prove useful. Mix and match antifungal ingredients like hydrogen peroxide, white vinegar, and sodium borate (borax) powder into water-based cleaners.
Use tight-bristled scrub brushes and reasonably sturdy putty knives to manually agitate solutions into mold patches, traversing the entire veneer across grains back and forth, ensuring no residue remains. Allow 10-15 minutes contact time before rinsing clean. Repeat if necessary.
Small doses of bleach may be used, provided adequate PPE ventilation isolates fumes. However, being chloride-based bleaches damage cellulose fiber structures through oxidation without biocidal selectivity. Plant-derived anti-microbials like tea tree and clove oils in carrier liquids make excellent antifungals, too. Dependent on paint/finish coat permeability, liquids penetrate, killing mold effectively while preventing recolonization likelihood for some months before reapplication need arises.
Tip 6: Seek Professional Input for Advanced Mold Growth
While methods discussed target surface mold on raw/unfinished wood, furniture with intricate molding, cracks, and finished surfaces often host covert fungal networks underneath pigmented paint, putty, nail holes, etc., which is quite challenging for layperson removal. Similarly, growth spanning over a 1 square foot area concentrates spore densities manifold.
Seeking an experienced mold remediation specialist to help diagnose contamination depth/degree accurately using moisture meters, lab culture kits, etc. Professionals mitigate complex sites safely via containment chambers regulating airlock entry/exit avoiding indoor air contamination from high-concentration spores from wide area disruption. Commercial HEPA vacuums clear microscopic particulates missed during DIY cleanup.
Licensed technicians employ commercial-grade respirators, ventilators, and high-pressure sprayers dosing bespoke anti-mold formulations tailored to application sites like wood, masonry, etc, without jeopardizing the integrity or indoor air quality is given training in precision dispersal after pre-testing formulations’ efficacy, specifically against sampled colony fungal species.
Tip 7: Prevent Future Regrowth by Reducing Moisture, Maintaining Proper Ventilation
The key strategy for preventing recurrent mold colonies on remediated wood is strictly managing ambient moisture enabling spore germination in the first place. Install hygrometers or humidistat monitors that trigger dehumidifiers automatically once relative humidity crosses the 55% threshold. Ensure sufficient airflow circulation to minimize stagnant moisture pockets through regularly-cleaned ventilation grilles.
Address plumbing leaks immediately before leakage seeps structural framing—weatherproof exterior walls against precipitation intrusion, especially in basements and crawlspaces. Create adequate drainage gradient sloping ground away from the foundation. Divert roof runoff through pipes 6 feet from the perimeter.
Applying a topcoat wood finish like polyurethane forms a protective coating, denying moisture incursion in the woodgrain beneath. Monitoring wood routinely henceforth allows prompt remediation care as soon as early-stage mold manifests before extensive colonies recur, needing extensive removals. With diligent, proactive efforts maintaining environmental parameters in check, restored woodwork stays pristine, perpetually preventing major mold havoc.
Conclusion
Mold in wood does not remain an inevitable eyesore or health hazard if addressed effectively early using appropriate removal techniques based on the type and extent of infestation while being mindful of necessary health precautions limiting contact/inhalation. Prevent future regrowth proactively through strict moisture control and maintaining adequate ventilation, denying fungi the nurturing environment to repeat damage to wood infrastructure and indoor air.
When mold begins to spread on wooden surfaces, it can quickly compromise both appearance and structural integrity. For homeowners facing persistent issues, turning to professional mold removal Sacramento services ensures a deep, lasting solution that tackles the root cause—not just the symptoms.
editor's pick

latest video
news via inbox
Nulla turp dis cursus. Integer liberos euismod pretium faucibua